Spicy Grilled Chicken Barbecue Recipe
Let me tell you, there’s nothing quite like that first bite of perfectly grilled chicken—still warm, tender, and infused with smoky, savory goodness. I remember the days of outdoor barbecues with friends, the smell of charred herbs wafting through the backyard, and my kids asking for seconds before I even set the platter down. That’s the magic I want to share with you today—my favorite grilled chicken recipe that’s become a staple in my house. It’s what I turn to on busy weekdays when I want something quick and nourishing, but also special enough to serve company. Honestly, I’ve made this countless times, tweaking the marinade here and there, and it never, ever fails to impress. Plus, it’s surprisingly simple—no fancy equipment needed, just a good grill and a little love. If you’re craving something that hits all those comfort notes and flavor bombs, stick around—I’ll walk you through every step.Trust me, once you try this, it’ll be on your weekly rotation too!
What is grilled chicken?
Think of grilled chicken as a juicy, smoky take on your everyday poultry. It’s essentially chicken—usually breasts, thighs, or drumsticks—that’s marinated or seasoned, then cooked over direct or indirect heat on a grill until perfectly charred and tender. The name says it all: it’s grilled. But what makes it shine is that unbeatable combination of smoky flavor, crispy edges, and moist insides. Sometimes, people think grilled chicken is just about throwing a plain piece on the grill and hoping for the best. Nope! It’s about seasoning deeply, marinating for flavor, and mastering those tricky grill marks that make it visually irresistible. It’s a versatile protein—good on its own, added to salads, stuffed in tacos, or layered into sandwiches. And because it’s quick to cook and easy to customize, it’s become my go-to for everything from weeknight dinners to summer gatherings. Plus, it’s pretty budget-friendly—great tasting doesn’t have to mean expensive!
Why you’ll love this recipe?
What I love most about this grilled chicken is its flavor profile. The marinade? It’s a little tangy, slightly sweet, with just enough herbaceous punch to keep things interesting. I’ve tested this with everything—fresh thyme, roasted garlic, even a splash of citrus—and honestly, I think the secret is in the balance. The smoky char adds depth that no oven-roasted chicken can compete with, and that aroma alone will have everyone coming to the grill. But beyond flavor, this recipe is a lifesaver on busy nights. It’s straightforward, relies on pantry staples, and comes together faster than you might imagine—less time than ordering takeout, really. And the best part? It’s unbelievably versatile. My family loves it sliced up on salads, tucked into tacos with all the fixings, or served as is with a side of roasted veggies. It’s also budget-friendly, which is a huge win—fewer ingredients, more flavor. Plus, I guarantee once you master this, you’ll be surprised how often you get compliments! I’ve tried similar recipes, but honestly, this one’s the gold standard in my book. It’s become a real favorite, especially when I want something homemade and satisfying with minimal fuss, and I know that’s exactly what you’re looking for too.
How do I make a delicious grilled chicken?
Quick Overview
This grilled chicken recipe is all about marinating the meat ahead of time—preferably for a few hours or even overnight—to lock in flavor and tenderness. Then, it’s a quick sear over medium-high heat until charred and cooked through. The magic is in the marinade, which you can customize to your taste—think lemon and herbs, smoky paprika, or a spicy kick. The grill does all the work, providing that irresistible smoky crust while keeping the insides juicy. It’s a straightforward process that’s perfect for weeknights when you want fast, flavorful results without complicated techniques. Trust me, it’s the kind of recipe that makes you look like a grilling pro—and your friends will think you’ve spent hours at it! The best part? That crispy exterior, tender interior, and complex flavor come together in under 30 minutes of actual cooking once marinated. Ready to master your own juicy grilled chicken? Let’s get started!
Ingredients
For the Marinade:
– 1/4 cup olive oil, good quality because this is what trees through the flavor
– Juice of 1 lemon (or substitute lime or orange if you like a different citrus note)
– 3 cloves garlic, minced
– 1 teaspoon smoked paprika (for that smoky depth)
– 1 teaspoon dried oregano or thyme (fresh is better if you have it!)
– 1 teaspoon salt
– 1/2 teaspoon black pepper
– 1 teaspoon honey or maple syrup (for just a hint of sweetness)
– Optional: pinch of red pepper flakes for heat
For the Chicken:
– 4 boneless, skinless chicken breasts or thighs (thighs stay juicy, but breasts are quicker)
– Or whole chicken parts, if you prefer, adjusted accordingly
Step-by-Step Instructions
Step 1: Preheat & Prep the Grill
Get your grill heated to a medium-high setting—around 400°F (200°C). Clean the grates thoroughly with a wire brush, then oil them lightly with a paper towel dipped in oil to prevent sticking. If you’re using charcoal, set up for two-zone cooking—hot side and cooler side—so you can control the cook without flare-ups. For gas grills, simply turn all burners to medium-high and get ready. I always do this first so the grill is nice and hot when it’s time to cook. Remember, a hot grill gives you those gorgeous sear marks and keeps the chicken from sticking. This prep can be done in just 10 minutes, and it’s worth it for that perfect crust!
Step 2: Mix Dry Ingredients
In a small bowl, whisk together the smoked paprika, oregano, salt, pepper, and red pepper flakes if using. This dry mixture will give the chicken a flavor burst and ensures even seasoning. I always do this first so I’m ready to marinate. Trust me, this step might seem small but it makes a big difference in flavor distribution. Plus, I’ve learned the hard way—skipping the dry spice mix means uneven flavor—and nobody wants bland bites!
Step 3: Mix Wet Ingredients
In a separate bowl, combine the olive oil, lemon juice, minced garlic, honey, and a splash of water if needed to thin out the marinade a bit. Whisk everything together until it’s smooth and fragrant. This mixture is what will penetrate the chicken, making it juicy and flavorful. I always taste a little—yep, it’s delicious already! Sometimes I add a teaspoon of Dijon mustard or a splash of soy sauce for extra depth. Once done, it’s time to combine everything.
Step 4: Combine
Place the chicken in a large zip-top bag or shallow dish, pour the marinade over, and toss to coat thoroughly. Seal and refrigerate for at least 2 hours—preferably overnight—so those flavors really sink in. I’ve learned that the longer chicken marinates, the more tender and flavorful it gets. When you’re ready to cook, take it out of the fridge and let it sit at room temperature for 15 minutes. That little step really helps it cook evenly.
Step 5: Prepare Filling
While your chicken is marinating, I like to prep any additional fillings or toppings, like grilled veggies or fresh herbs. If you want to get fancy, you can stuff the chicken with cheese or spinach before grilling, but honestly, the marinade is enough for amazing flavor. For the filling, I sometimes sprinkle chopped fresh herbs or thin slices of jalapeño for a spicy kick—totally optional, but fun to customize.
Step 6: Layer & Swirl
This step applies if you’re doing any marbled or layered presentation—like marinating a whole chicken or slicing it after grilling. For now, just remember that giving the chicken a little shake in the marinade ensures each piece is coated evenly. When placing on the grill, lay the chicken pieces flat and let them sear without fussing—resist the urge to poke or flip too soon. You want that beautiful crust to develop first, then flip once the edges look caramelized.
Step 7: Bake
If you’re grilling breasts or thighs, place them on the hot section of your grill. For even cooking, cover and cook for 6-8 minutes per side, depending on thickness. It’s done when the internal temperature hits 165°F (75°C) for breasts and a little higher for thighs. I always use a digital thermometer—trust me, it prevents overcooking or undercooking. For bone-in pieces, you’ll need a bit more time. The key is to avoid piercing the chicken too early—let that smoky crust be your reward.
Step 8: Cool & Glaze
Once cooked, transfer the chicken to a cutting board and let it rest for 5 minutes. This keeps all those flavorful juices inside. If you love a shiny glaze, brush some extra marinade or a honey-mustard mixture on right after grilling. It just adds that extra bit of sweetness and visual appeal. You can also serve it without glaze, but I highly recommend a quick brush for that beautiful shine and flavor boost. Just be careful not to brush on raw marinade that’s been sitting with raw chicken—cook it down first if you want to use it as a glaze.
Step 9: Slice & Serve
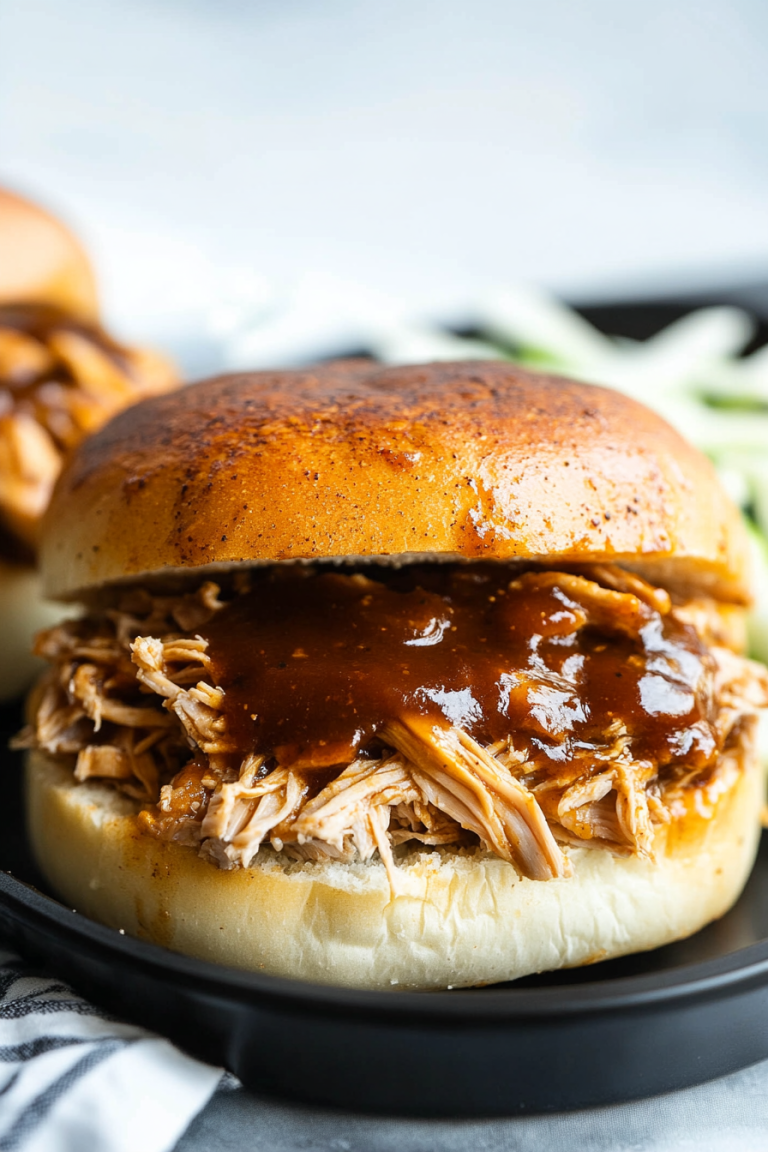
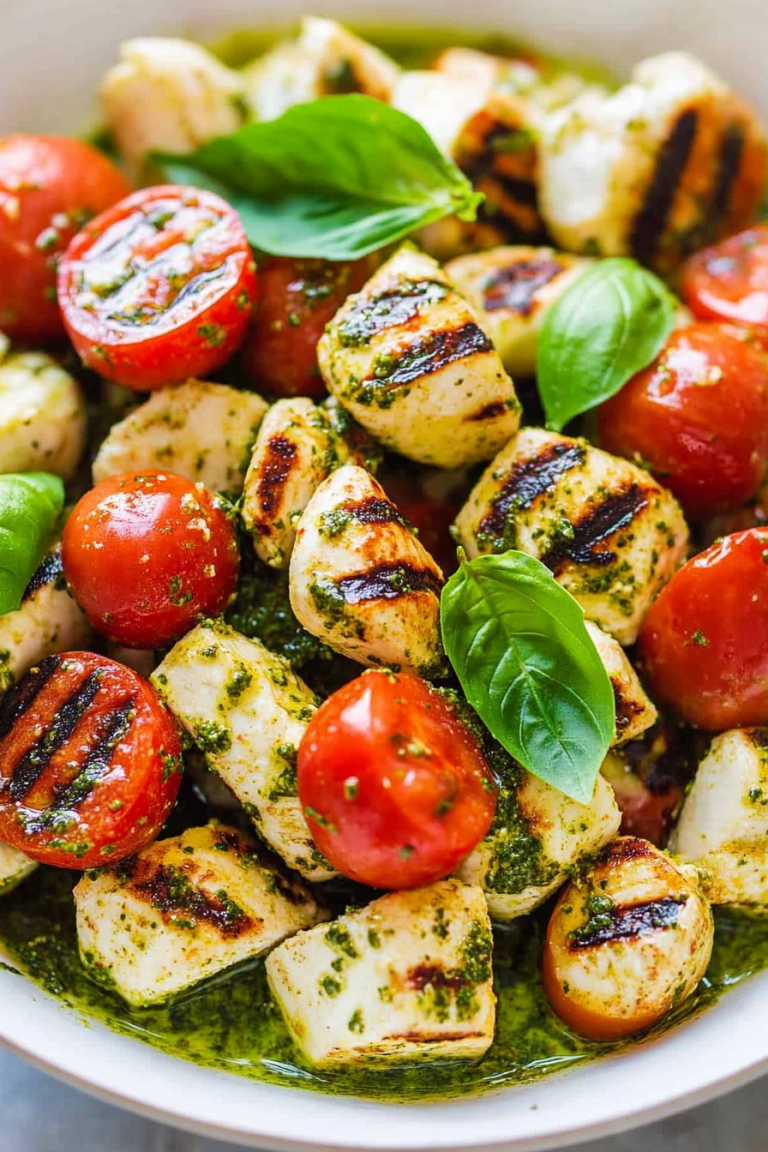
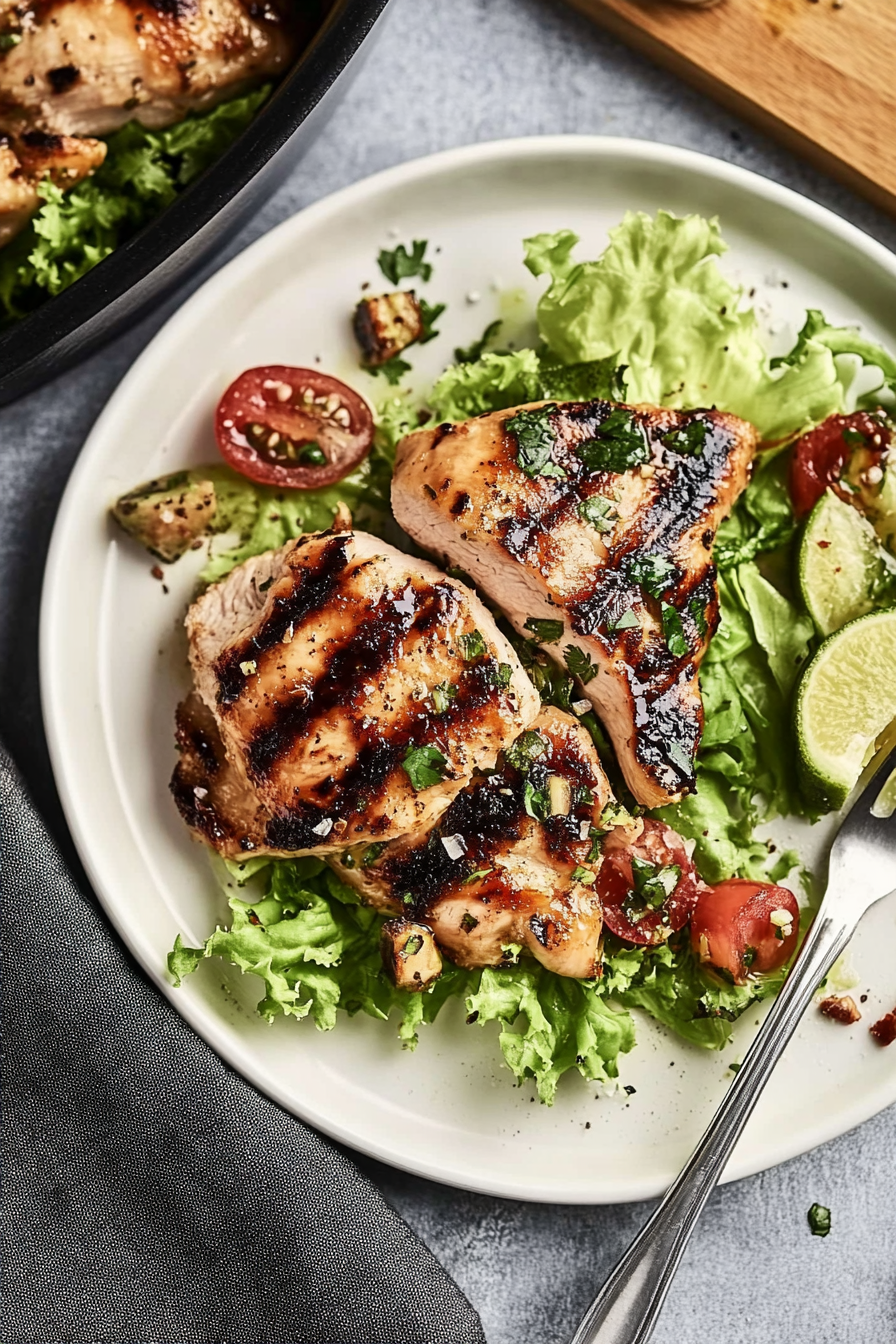
Now for the fun part: slicing! Using a sharp knife, cut against the grain into thick slices or strips. Serve immediately—hot, juicy, and dripping with flavor. This grilled chicken looks gorgeous on a platter, drizzled with a little fresh lemon juice or sprinkled with herbs. I love serving it with a side of grilled veggies or on top of a crisp salad. Sometimes, I even toss leftovers into a wrap or a cold pasta salad the next day. The aroma alone will gather everyone in the kitchen—you’ll see what I mean!
What to Serve It With
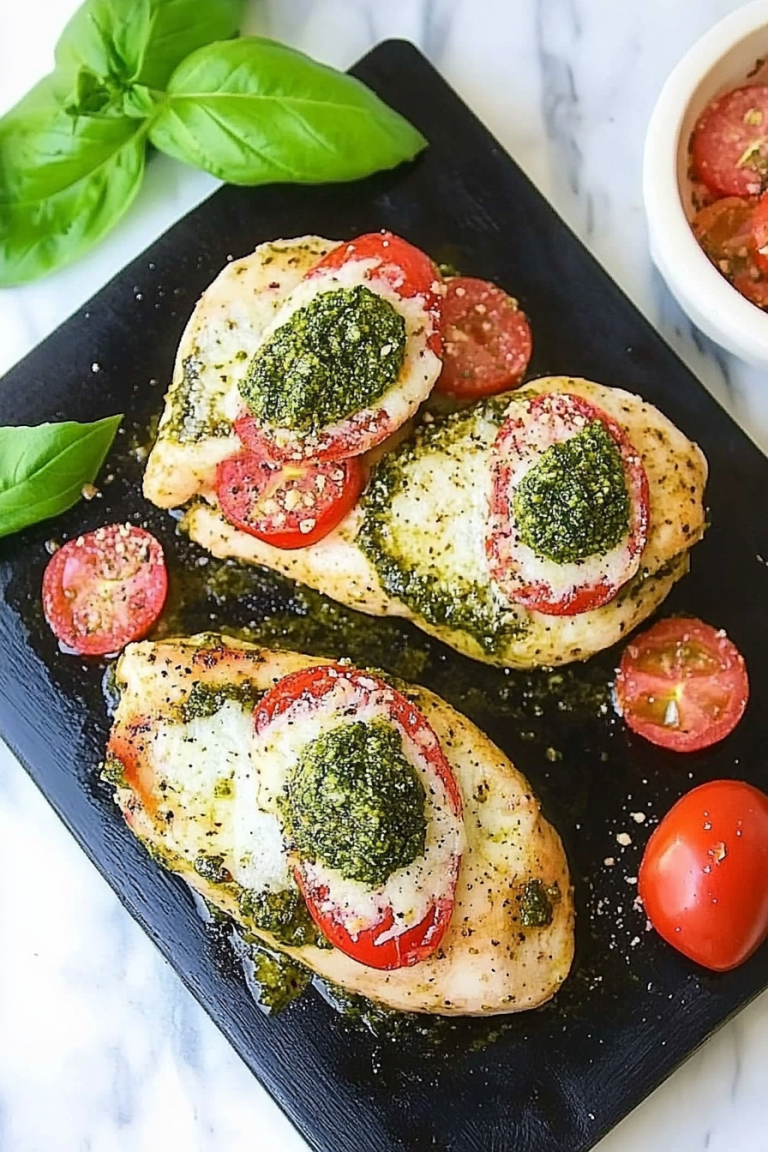
This grilled chicken is incredibly versatile, so the options are endless. For breakfast, slice it up into a breakfast burrito with scrambled eggs and salsa—trust me, it’s a game-changer. On brunch days, serve it alongside a fresh strawberry spin on a caprese salad, paired with crisp white wine or sparkling water infused with citrus. As a main course at dinner, it pairs beautifully with roasted sweet potatoes, grilled corn on the cob, or a simple Israeli couscous salad with herbs. My family also loves it as part of taco bar night—just warm corn tortillas, some chopped cilantro, and a squeeze of lime. That smoky flavor elevates even the simplest sides. A good rule of thumb: think of this grilled chicken as the star of the show, whether on a plate or wrapped tight in a tortilla—you really can’t go wrong.
Top Tips for Perfecting Your Juicy Grilled Chicken
After making this dozens of times, I’ve picked up a few tricks to keep your chicken looking and tasting perfect every time. First, always marinate for at least 2 hours—preferably overnight—so the flavors really penetrate. If you’re short on time, a quick 30-minute marinade still helps, but the longer, the better. When it comes to seasoning, don’t be shy—use generous amounts of salt and garlic, and taste your marinade before adding the chicken to make sure it’s bright and balanced. For the grill, I recommend oiling the grates well and preheating fully—nothing worse than sticking or uneven cooking. When flipping, use tongs instead of a fork to avoid losing juices—gentle but firm is the way to go. For those looking to add a smoky flavor, tossing some soaked wood chips on the coals or using a smoker box works wonders. I’ve tested substituting different herbs—basil, dill, even rosemary—that all bring their own twist. As for the glaze, you can switch up honey with balsamic vinegar or add a splash of soy or fish sauce to intensify umami. The key is to keep experimenting until you find what tastes best for you. This recipe is forgiving, flexible, and, most importantly, just downright delicious—trust me, once you get the hang of grilling chicken like this, you’ll be hooked!
Storing and Reheating Tips
If you have leftovers—or want to prepare ahead—here’s what works best. Store cooked grilled chicken in an airtight container in the refrigerator for up to 3 days. I like to slice it before storing so it’s easier to reheat later—less mess, less drying out. Reheat gently in the microwave or in a skillet over low heat, covered, to keep that juicy interior. If you plan to hold it for longer, freezing is a good option. Wrap tightly in plastic wrap and then foil, or store in freezer-safe containers for up to 3 months. To thaw, leave in the fridge overnight or use the defrost setting on your microwave. Just note that reheated chicken can dry out if overdone, so add a splash of broth or water and cover when reheating to keep it moist. For the glaze, I recommend adding it after reheating instead of before, to keep that glossy, flavorful finish. Honestly, leftovers are just as tasty sliced cold on salads or tucked into wraps—my kids especially love cold grilled chicken for school snacks. With proper storage, this grilled chicken stays tender and flavorful days later—and that’s a win in my book!
Frequently Asked Questions
Final Thoughts
If there’s one recipe you should keep in your back pocket, it’s this juicy, smoky grilled chicken. The flavor simply can’t be beat, and the process is straightforward enough that even a novice griller will feel like a pro. I always say, the key is in the marinade—let that do its magic overnight if possible—and then embrace that grill’s heat. The smell alone will bring everyone to the table, and the taste? Well, it’s the kind of thing that makes people ask for your secret. Whether it’s a weeknight dinner, a summer barbecue, or a casual family lunch, this dish hits the spot every single time. So go ahead—fire up that grill, get your marinade ready, and start creating delicious memories. And when you do, come back and tell me how it turned out—I love hearing your stories! Happy grilling, my friend!
Grilled Chicken Salad
Ingredients
Method
- Preheat the grill to medium-high heat. Season the chicken breasts with salt and pepper.
- Grill the chicken for 6-7 minutes per side until fully cooked and juices run clear. Let rest for 5 minutes, then slice.
- In a large bowl, combine the salad greens, cherry tomatoes, cucumbers, and feta cheese.
- Top the salad with sliced grilled chicken. Drizzle with your favorite vinaigrette and serve.