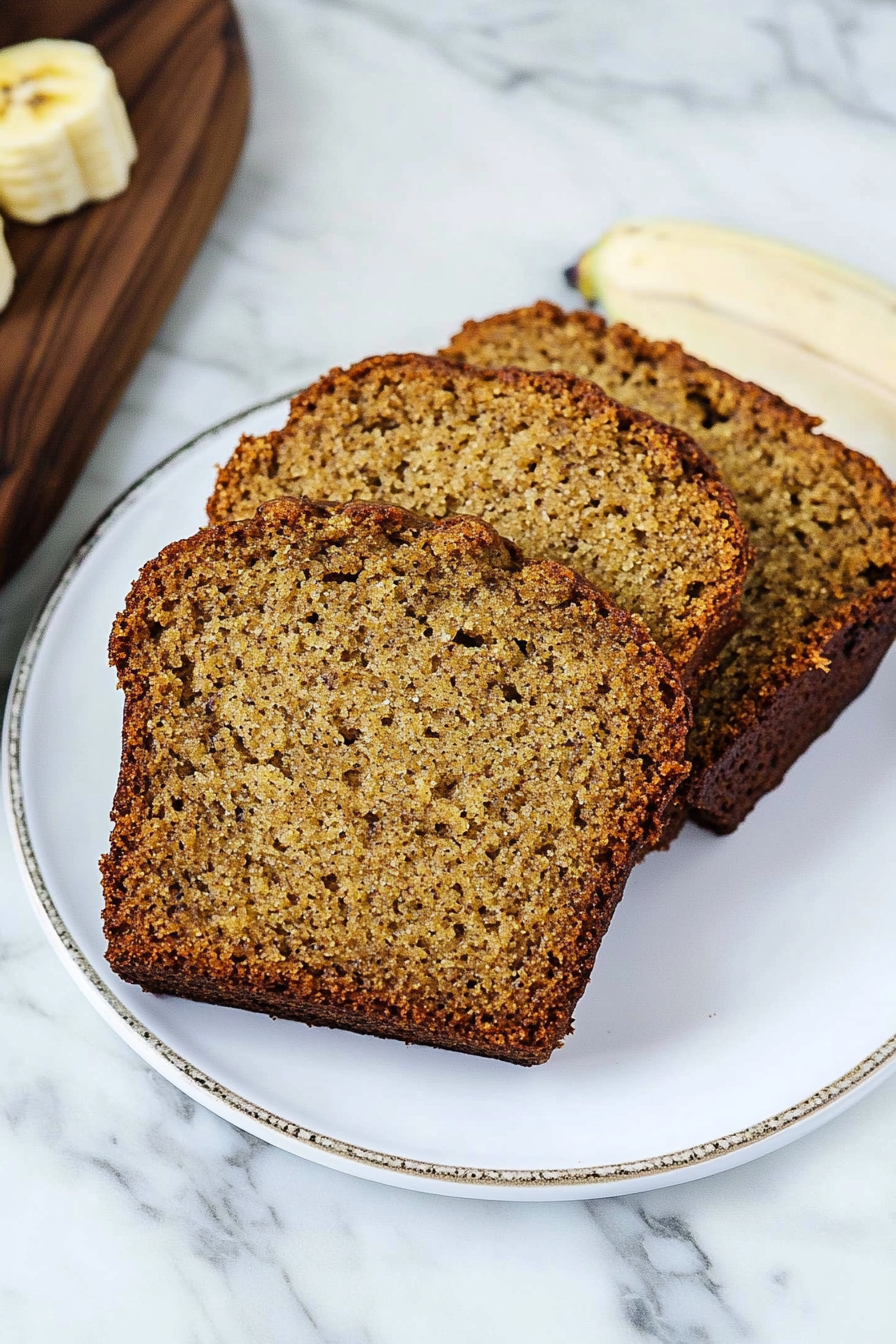
Warm Spiced Banana Bread A Simple Treat
I can still remember the smell wafting through my grandma’s kitchen on a lazy Sunday morning—warm, buttery, with just a hint of ripeness from those overripe bananas she always kept on hand. As a kid, I swear I’d sneak a piece before breakfast, the sticky sweetness lingering on my fingers. That aroma is etched into my memory, and honestly, nothing beats the cozy comfort of a perfect banana bread. Over the years, I’ve played around with countless recipes, trying to make it just right—moist but not gummy, sweet but not overwhelming, with a tender crumb that melts in your mouth. Trust me, this banana bread recipe is a special one; it’s become a staple in my house. My kids ask for it all the time, and I love how forgiving it is—no fancy equipment required, just simple ingredients and a little love. Whether you’re after a quick breakfast, a teatime treat, or a cozy dessert, this loaf will always hit the spot. Plus, it’s a great way to use up those bananas that are way too ripe to enjoy plain. Let’s get baking!
What is banana bread?
Think of banana bread as a sweet, moist loaf that’s basically a healthful way to enjoy bananas, baked into a dense yet tender treat. It’s kind of like a cross between cake and bread—rich in flavor but hearty enough to serve for breakfast or snack time. The name comes from its main ingredient: bananas, which lend a natural sweetness and moisture that makes every bite feel indulgent. It’s essentially a humble comfort food, with roots going back to ancient times, but it really took off in America during the early 20th century when baking powder and soda became popular. Nowadays, banana bread is a canvas for all kinds of tweaks—adding nuts, chocolate chips, or even swirls of peanut butter. The best part? It’s super forgiving, so even if you’re new to baking, you’ll find it hard to mess this one up. Honestly, it’s like a warm hug in bread form—sweet, moist, and endlessly customizable.
Why you’ll love this recipe?
What I love most about this banana bread is how incredibly versatile and forgiving it is. It’s a no-fuss recipe that comes together quickly, making it perfect for those mornings when you want something homemade but don’t want to spend hours in the kitchen. The smell alone is enough to bring everyone to the table—think warm, caramelized bananas mingling with that cozy scent of baked batter. Plus, it’s budget-friendly because most of what you need are pantry staples—you probably already have the ingredients tucked away. I’ve made this recipe with dark chocolate chips, chopped walnuts, and even with a splash of vanilla or cinnamon; it’s always a hit. And because it’s so moist and filling, it’s great for breakfast, snack, or even as a comforting dessert with a dollop of whipped cream or a drizzle of honey. Honestly, I think it’s the kind of recipe you’ll find yourself craving at least once a week. Trust me, once you master this, it’s hard to go back to store-bought banana bread—and it’s so satisfying to know exactly what’s in it.
How do you make banana bread?
Quick Overview
This banana bread is all about simplicity. You start with mashed bananas, add your dry ingredients, then fold everything together without overmixing—that’s key for a tender crumb. A couple of secret tips make it extra moist: don’t skimp on the bananas, and don’t overbake. You’ll swirl in your favorite extras if you like, then bake until a toothpick comes out clean. The whole process takes about an hour, and the smell will fill the house with something magical. It’s one of those recipes where everything comes together effortlessly, and the result is a loaf that’s beautifully moist on the inside with a caramelized crust. Perfect for slicing and sharing!
Ingredients
For the Main Batter:
– 4 ripe bananas (the browner, the better – they mash easily and are super sweet)
– 1/2 cup melted unsalted butter or olive oil (both work great)
– 1 cup granulated sugar (or honey/maple syrup for natural sweetness)
– 2 large eggs (preferably room temperature)
– 1 teaspoon vanilla extract
– 2 cups all-purpose flour (I like unbleached for more flavor)
– 1 teaspoon baking soda
– 1/2 teaspoon salt
For the Filling (optional but highly recommended):
– 1/2 cup chopped walnuts or pecans
– 1/2 cup chocolate chips or chunks
For the Glaze (if you’re feeling fancy):
– 1/4 cup powdered sugar
– 1-2 teaspoons milk or lemon juice
– A touch of vanilla or lemon zest for extra flavor
Step-by-Step Instructions
Step 1: Preheat & Prep Pan
Start by preheating your oven to 350°F (175°C). Line a loaf pan with parchment paper or grease it well with butter or spray – I always do this to make sure nothing sticks. If you want a crunchy crust, sprinkle a little sugar on the bottom before adding the batter. This simple step ensures easy removing and that lovely golden top.
Step 2: Mix Dry Ingredients
In a bowl, whisk together the flour, baking soda, and salt. I do this first to make sure everything is evenly distributed, so your bread rises uniformly. Sifting isn’t necessary, but it keeps the batter nice and smooth if you want that extra light texture.
Step 3: Mix Wet Ingredients
In a separate large bowl, mash the bananas with a fork or potato masher until smooth, then stir in the melted butter, sugar, eggs, and vanilla. I always do this right in the bowl, using the same utensil to keep things simple. The batter should look glossy and a bit liquidy—trust me, it’s the moisture that makes it so tender.
Step 4: Combine
Add your dry ingredients to the wet, then gently fold everything together just until combined. Don’t overmix! A few lumps are totally fine. Overmixing can lead to a dense, rubbery loaf, and nobody wants that. If you’re adding nuts or chocolate, fold them in now.
Step 5: Prepare Filling
If you’re using any extras, like chocolate chips or nuts, sprinkle them into the batter and fold briefly, or layer them in later for an eye-pleasing swirl—more on that in a second.
Step 6: Layer & Swirl
If you’re feeling fancy, pour half the batter into the pan, then add a layer of your filling, and top with the remaining batter. Use a knife or skewer to gently swirl the layers together—this creates those beautiful marbled streaks I love. It’s just as pretty as it is tasty.
Step 7: Bake
Pop it into the oven and bake for about 50-60 minutes. Check it around 50 minutes—insert a toothpick into the center, and if it comes out clean, it’s ready. If not, give it 5 more minutes. The top should be a deep golden brown, with that sweet aroma filling your kitchen.
Step 8: Cool & Glaze
Once it’s baked, let it cool in the pan for about 10-15 minutes. Then transfer to a wire rack to cool completely—this prevents sogginess. If you’re adding a glaze, do it when the bread is just warm or fully cooled, depending on your preference. Trust me, a little powdered sugar glaze turns this into a dessert-level treat!
Step 9: Slice & Serve
Use a serrated knife to slice the bread into thick, satisfying pieces. I love serving it warm with a pat of butter or a smear of cream cheese. Leftovers keep nicely in an airtight container, and honestly, I think it’s even better the next day—moist, flavorful, with those caramelized edges.
What to Serve It With
This banana bread is such a versatile treat, I like to keep things simple yet cozy. For breakfast, it pairs beautifully with a hot cup of coffee or tea—trust me, that first sip and warm bread combo is pure comfort. I often like to toast leftover slices and spread a bit of butter or honey. It’s also perfect for brunch—serve it alongside fresh fruit, some whipped cream, or a dollop of Greek yogurt for a more elegant presentation.
As a dessert, I love warming up a slice and topping it with vanilla ice cream or a drizzle of caramel sauce. My kids usually ask for seconds, especially when I sneak in some chocolate chips or walnuts. And on lazy Sunday afternoons, a big slice with a glass of milk just feels like a hug in bread form. Honestly, this banana bread has become my go-to recipe for comfort, sharing, and reinventing with different add-ins. I bet once you try it, you’ll be hooked, too.
Top Tips for Perfecting Your Banana Bread
To get that perfect banana bread every time, I’ve picked up a few tricks from trial and error. First, always use very ripe bananas—they’re sweeter and mash more easily. I’ve tested with frozen bananas, which work okay if thawed and drained, but fresh, spotty ones really give that deep flavor. When mixing, resist the urge to overdo it; a gentle fold keeps the crumb light. I’ve learned to wait until the top is beautifully golden before testing for doneness—an overbaked loaf dries out quickly. For swirling in extras, pour half the batter, add your goodies, then top with remaining batter and swirl delicately. The visual effect is so stunning! If you want to swap ingredients, applesauce can replace some of the butter for a healthier spin—just reduce the sugar slightly to balance it out. And don’t forget: even if it’s not perfectly golden on top, a toothpick test is your best friend. Once you master these tips, every loaf will come out better than the last.
I’ve also learned that slightly underbaking can keep your bread moist, and that wrapping leftovers tightly in foil helps preserve freshness. Just a quick note—if you’re adding chocolate, keep in mind it can make the loaf a little more delicate when slicing, so let it sit for a few minutes after baking. Trust me on this, patience pays off.
Storing and Reheating Tips
This banana bread is best enjoyed fresh, but if you have leftovers (which is rare in my house!), here’s how to keep it tasting amazing. At room temperature, I recommend wrapping slices tightly in plastic wrap or storing in an airtight container for up to 2 days. This keeps it moist and fresh. If you’re planning to keep it longer, refrigerate for up to a week—just make sure it’s well wrapped to avoid drying out or absorbing fridge odors. For longer storage, freezing is your friend. Wrap the whole loaf or individual slices tightly with plastic wrap, then alla round with foil, and freeze for up to 3 months. To reheat, let it thaw at room temperature or warm slices in the microwave for about 20 seconds—just enough to bring back that cozy warmth with melty chocolate or buttery aroma. If you’ve glazed the bread, it’s best to add the glaze fresh when serving, but you can also warm the loaf and drizzle later for a shiny, irresistible finish.
Frequently Asked Questions
Final Thoughts
Honestly, I could go on and on about this banana bread. It’s one of those recipes that feels like a warm hug—simple, reliable, and endlessly adaptable. After years of trying different versions, I’ve settled on this one because it checks all the boxes: moist, flavorful, forgiving, and comforting. I love how the ripe bananas belt out sweetness, balanced with a hint of vanilla and that toasty crust on top. Over the years, I’ve shared countless slices with friends and family, and every time, I get the same reaction: “Wow, this is better than I expected!” It’s so satisfying to see everyone enjoy a homemade treat that cost next to nothing but tastes like a million bucks. Whether it’s for a lazy weekend brunch, a quick breakfast, or a cozy night snack, this banana bread will never let you down. I encourage you to play around with the add-ins and make it your own. And hey, if you try it, I’d love to hear how it turned out—leave a comment below! Happy baking, and may your kitchen be filled with the irresistible aroma of this beloved loaf.
Classic Banana Bread
Ingredients
Method
- Preheat the oven to 350°F. Grease a loaf pan.
- In a bowl, mash bananas until smooth.
- In a separate bowl, whisk melted butter, sugar, eggs, and vanilla.
- Combine wet and dry ingredients, then add baking soda and salt.
- Pour batter into the prepared loaf pan.
- Bake for 60 minutes or until a toothpick inserted comes out clean.
- Allow to cool before slicing.